Sometimes you need to put one thing on top of another. A good example is when the indices over which to sum are a complicated intersection of sets. In order to have them appear nicely below the summation consider using \substack as opposed to \atop. The Internet is rife with documentation for these commands. I will just mention the use of \substack in LyX:
In a math mode box you can type \substack. This will turn into the substack mode box. Here you can type your first line. To get the next line just hit Ctrl+Return. This will send you into the next line where you can type your line. I guess you can continue in this fashion to some point limited by some cryptic limit that has been hard-coded into the innards of LyX. ;p
Sunday, September 11, 2011
Tuesday, September 6, 2011
LyX: Wierd behavior with \setcounter{}{}
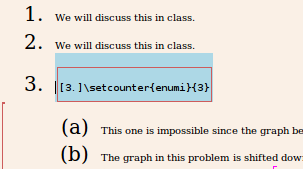
Sometimes I want to change the number used for an enumerated list item. For example, if an item is supposed to labeled 2, and I want it to instead read 3 (thus effectively skipping 2), then I would add an ERT box after the enumerated item's number, but before the item. Inside the ERT box, in this example, goes
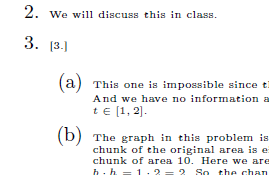
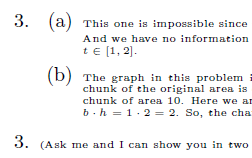
[3.]\setcounter{enumi}{3}
Usually this works. But sometimes this does not work and instead the usual number, in this case, 2 is displayed and then [3.] is displayed following the 2.
After comparing working and non-working instances, I was able to determine that the non-working instances had the \noindent LaTeX code. The following are examples of working and non-working instances.
Works:
-----------
\begin_layout Enumerate
\begin_inset ERT
status open
\begin_layout Plain Layout
[3]
\backslash
setcounter{enumi}{3}
\end_layout
\end_inset
-----------
Doesn't work:
-----------
\begin_layout Enumerate
\noindent
\begin_inset ERT
status open
\begin_layout Plain Layout
[3]
\backslash
setcounter{enumi}{3}
\end_layout
\end_inset
-----------
Plus, if you get it working without the \noindent, if you try to shrink the font down to tiny, the same behavior results even without any \noindent to be found in the LyX code.
For example, if you see that the ERT box has shruken along with the surrounding text (blue highlighting only for emphasis):
then your pdf will look like this:
Note the annoying [3.] that shows up here. While if you reset the font size of the ERT box (including that right up next to the first shrunken text), like so
 your pdf will look correct, like this:
This post provides a workaround, but does not provide a full understanding of the underlying issue. :(
Don't ask me why, but yes, I have multiple 3s in a row.
[3.]\setcounter{enumi}{3}
Usually this works. But sometimes this does not work and instead the usual number, in this case, 2 is displayed and then [3.] is displayed following the 2.
After comparing working and non-working instances, I was able to determine that the non-working instances had the \noindent LaTeX code. The following are examples of working and non-working instances.
Works:
-----------
\begin_layout Enumerate
\begin_inset ERT
status open
\begin_layout Plain Layout
[3]
\backslash
setcounter{enumi}{3}
\end_layout
\end_inset
-----------
Doesn't work:
-----------
\begin_layout Enumerate
\noindent
\begin_inset ERT
status open
\begin_layout Plain Layout
[3]
\backslash
setcounter{enumi}{3}
\end_layout
\end_inset
-----------
Plus, if you get it working without the \noindent, if you try to shrink the font down to tiny, the same behavior results even without any \noindent to be found in the LyX code.
For example, if you see that the ERT box has shruken along with the surrounding text (blue highlighting only for emphasis):

then your pdf will look like this:

Note the annoying [3.] that shows up here. While if you reset the font size of the ERT box (including that right up next to the first shrunken text), like so
 your pdf will look correct, like this:
This post provides a workaround, but does not provide a full understanding of the underlying issue. :(
Don't ask me why, but yes, I have multiple 3s in a row.
Sunday, September 4, 2011
Changing property of multiple objects in xfig
Sometimes one wants to give a group of objects in an xfig figure the same property. For instance, I want to make each object in my current selection have a common depth. Does anyone know how to accomplish this?
Graphics xfig can edit
It is often necessary in teaching and writing to modify a plot of data or a graph of a function using xfig. For instance, I create eps figures from Matlab or wxMaxima, and I need to edit out unnecessary tick marks or tick mark labels. xfig can operate on *.fig files. So, you need to convert the eps file to a fig file. This blog post is just a shout-out to Linux for Research's short post about it. Find it here. Thanks, Linux for Research!
Thursday, September 1, 2011
Forcing LyX to open newer file formats
Sometimes you create LyX files on the newer version, say, on your office machine, and try to open them on an older version, say, at your home machine. In order to put off upgrading my whole system (long story), I can simply rewrite the header information on the file.
Make a backup of the old file.
Identify the first two lines, which should look like:
Comment out those lines and add the following two lines above the now-commented-out lines
So that it reads
Note that when you open your new file you may receive error messages from LyX. You can ignore them at your own risk. If I see something serious I look more closely, but at the very least I can at least copy and paste my content into a new clean file from the older LyX.
Lastly, consider destroying the backup of the LyX file.
Make a backup of the old file.
Identify the first two lines, which should look like:
#LyX 2.0 created this file. For more info see http://www.lyx.org/
\lyxformat 413
Comment out those lines and add the following two lines above the now-commented-out lines
LyX 1.6.7 created this file. For more info see http://www.lyx.org/
\lyxformat 345
So that it reads
LyX 1.6.7 created this file. For more info see http://www.lyx.org/
\lyxformat 345
##LyX 2.0 created this file. For more info see http://www.lyx.org/
#\lyxformat 413
Note that when you open your new file you may receive error messages from LyX. You can ignore them at your own risk. If I see something serious I look more closely, but at the very least I can at least copy and paste my content into a new clean file from the older LyX.
Lastly, consider destroying the backup of the LyX file.
Monday, May 2, 2011
Deleting unwanted directories from Subversion
Here is the problem: I have svn-moved a whole bunch of files out from a directory tree that is being version-controlled by svn. E.g.
parent/dir_1/dir_A/file_1
parent/dir_1/dir_A/file_2
parent/dir_1/dir_B/file_3
parent/dir_1/dir_B/file_4
parent/dir_2/dir_A/file_5
parent/dir_2/dir_A/file_6
parent/dir_2/dir_B/file_7
parent/dir_2/dir_B/file_8
has become
parent/file_1
parent/file_2
parent/file_3
parent/file_4
parent/file_5
parent/file_6
parent/file_7
parent/file_8
Now I want to get rid of (remove from svn's version control and delete from the filesystem) the following directories
dir_1/
dir_1/dir_A/
dir_1/dir_B/
dir_2/
dir_2/dir_A/
dir_2/dir_B/
The way to do this so that you do not encounter conflict errors is like this:
user@computer>% cd parent
user@computer> svn delete dir_1
user@computer> svn delete dir_2
user@computer> svn update
user@computer> svn commit
If you try to skip the 'update' command, you will encounter conflict errors.
Sunday, April 24, 2011
Using Tagsistant
After installing Tagsistant we need to start it up and get it set up.
Make a directory that will contain tags:
(My pdf files are contained in a directory named Papers, so I append an tfs to denote that this is a tagsistant file system version of the original.)
To start Tagsistant:
Make some tags (note that "tags" are actually directories, and this explains why they are created using mkdir):
Add some files, i.e. Tag your files:
Note: Only one copy of paper_on_interpolation.pdf is stored is stored in ~/.tagsistant/archive/. This applies to paper_on_Legendre_polynomials.pdf, as well.
We can browse our files using tags now:
and we would get:
paper_on_Legendre_polynomials.pdf
while
produces:
paper_on_Legendre_polynomials.pdf
paper_on_interpolation.pdf
Shutting down the filesystem:
Note: Your files are still available (in ~/.tagsistant/archive/ as mentioned above) even when tagsistant is not running.
Make a directory that will contain tags:
user@computer> mkdir ~/Papers_tfs
(My pdf files are contained in a directory named Papers, so I append an tfs to denote that this is a tagsistant file system version of the original.)
To start Tagsistant:
user@computer> sudo tagsistant ~/Papers_tfs
Make some tags (note that "tags" are actually directories, and this explains why they are created using mkdir):
user@computer> mkdir ~/Papers_tfs/numerical_analysis
user@computer> mkdir ~/Papers_tfs/approximation_theory
user@computer> mkdir ~/Papers_tfs/orthogonal_polynomials
user@computer> mkdir ~/Papers_tfs/mathematics
Add some files, i.e. Tag your files:
user@computer> cp ~/Papers/paper_on_interpolation.pdf ~/Papers_tfs/numerical_analysis/
user@computer> cp ~/Papers/paper_on_interpolation.pdf ~/Papers_tfs/approximation_theory/
user@computer> cp ~/Papers/paper_on_interpolation.pdf ~/Papers_tfs/mathematics/
user@computer> rm ~/Papers/paper_on_interpolation.pdf
user@computer> cp ~/Papers/paper_on_Legendre_polynomials.pdf ~/Papers_tfs/numerical_analysis/
user@computer> cp ~/Papers/paper_on_Legendre_polynomials.pdf ~/Papers_tfs/orthogonal_polynomials/
user@computer> cp ~/Papers/paper_on_Legendre_polynomials.pdf ~/Papers_tfs/approximation_theory/
user@computer> cp ~/Papers/paper_on_Legendre_polynomials.pdf ~/Papers_tfs/mathematics/
user@computer> rm ~/Papers/paper_on_Legendre_polynomials.pdf
Note: Only one copy of paper_on_interpolation.pdf is stored is stored in ~/.tagsistant/archive/. This applies to paper_on_Legendre_polynomials.pdf, as well.
We can browse our files using tags now:
user@computer> ls -la ~/Papers_tfs/approximation_theory/AND/numerical_analysis/AND/orthogonal_polynomials/
and we would get:
paper_on_Legendre_polynomials.pdf
while
user@computer> ls -la ~/Papers_tfs/approximation_theory/AND/numerical_analysis/
produces:
paper_on_Legendre_polynomials.pdf
paper_on_interpolation.pdf
Shutting down the filesystem:
user@computer> sudo fusermount -u ~/Papers_tfs
Note: Your files are still available (in ~/.tagsistant/archive/ as mentioned above) even when tagsistant is not running.
Saturday, April 2, 2011
Installing Tagsistant on Ubuntu 10.10 Maverick Meerkaty
We need to compile this program from source. This can be scary but this is my experience and it was painless, luckily.
- Download the source code for the developer's website: http://www.tagsistant.net/ I put the zipped bundle in my local temp folder: ~/tmp/.
- Extract the contents into a local working folder: ~/tmp/Tagsistant/.
- Navigate to the folder with the source code.
- You will run './configure', 'make', and then 'make install'. But beware: any of these steps may halt and they will need to be re-run until they complete. The installation may not work unless you wait for the current step to be completed in full before proceeding to the next step. I encountered three things that went wrong in my installation: certain packages had not been installed, priviledges were not high enough, and certain folders could not be created. In each case read the messages carefully, and try to fix them in succession.
- During the './configure'-stage it complained that I did not have libfuse-dev and libsqlite3-dev . I used Synaptic to find and install each and whatever dependencies they asked for. The key part of the message here had the string: (I lost it.)
- During the 'make'-stage it complained that I did not have libgtk2.0-dev. I used Synaptic to find it and install it and whatever dependencies it requested. The key part of the message here had the string: gtk+-2.0 was not found.
- During the 'make install'-stage it complained that it could not make the folder /usr/local/share/pixmaps/tagsistant/ so I made it using 'sudo mkdir -p /usr/local/share/pixmaps/tagsistant/'. Upon re-running 'make install' it needed permission to make a file so I had to re-run using sudo: 'sudo make install'. After re-running this time, the installation completed.
- To make sure the program was known by my system I typed 'which tagsistant' and 'which tagman'. My system replied '/usr/local/bin/tagsistant' and '/usr/local/bin/tagsistant', respectively.
Subscribe to:
Comments (Atom)